# 10/Q Setup Guide
This guide covers installation of the public release of Switchroot Android 10/Q, based on LineageOS 17.1, on the Switch. The original guide upon which this is based can be found [here](https://forum.xda-developers.com/t/rom-unofficial-switchroot-android-10.4229761/). All photos are credited to @bylaws on XDA Developers Forum.
### Requirements
* RCM-exploitable Switch ([CHECK HERE FIRST](https://ismyswitchpatched.com/))
* RCM exploitation method (Usually a jig, but other methods can be found [HERE](https://noirscape.github.io/RCM-Guide/))
* Computer
* USB-C cable/USB-C Switch autoinjector
* High quality SD card >= 16GB
* microSD card reader for the computer
### Prerequisites
* Nuke any Switchroot Andorid Oreo, Pie, or Q dev builds before attempting to install this release
* Ensure SD is formatted as FAT32
### Steps
1. Download the latest version of the `hekate` bootloader from [HERE](https://github.com/CTCaer/hekate/releases) (`hekate_ctcaer_[version]_Nyx_[version].zip`)
2. Unzip the `hekate` archive to the root of the SD card
3. Download the latest zip [HERE](https://download.switchroot.org/android-10/) of either `icosa-tab` (standard tablet Android) or `icosa-atv` (Android TV)
4. Extract the zip to the root of the SD card (any major unzipping program should work fine as of 8/16/21)
Your SD card should now look like this, assuming it is shared with HOS (Horizon OS/Switch OS):
```
root
|- bootloader
| |- ini
| | |- ...
| |- payloads
| | |- ...
| |- res
| | |- ...
| |- sys
| | |- ...
|- Nintendo
| |- ...
|- switchroot
| |- android
| | |- ...
| |- install
| | |- ...
|- lineage-17.1-[date]-UNOFFICIAL-[device]-signed.zip
```
5. Boot into HOS and ensure Joy-Cons are paired
6. Insert your SD card into your Switch, slide the RCM jig into the right rail
7. Hook your Switch up to your PC (or other payload injector) via USB-C and power off the console
8. Press Power and VOL + simultaneously to enter RCM mode and inject the hekate payload (`hekate_ctcaer_[version].bin`) that came with your downloaded hekate zip
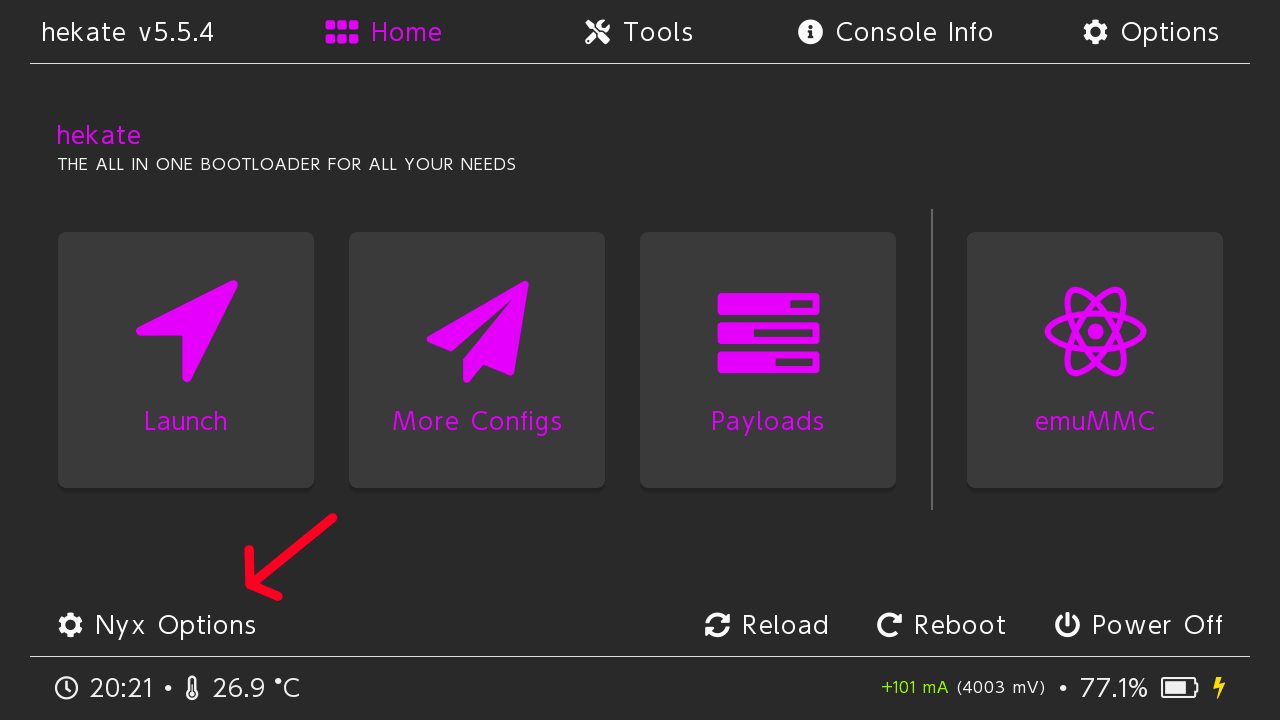
9. In `hekate`, launch Nyx Options
10. Dump your Joy-Con BT pairing information
11. Ensure the message is correct, otherwise repair in HOS and try again
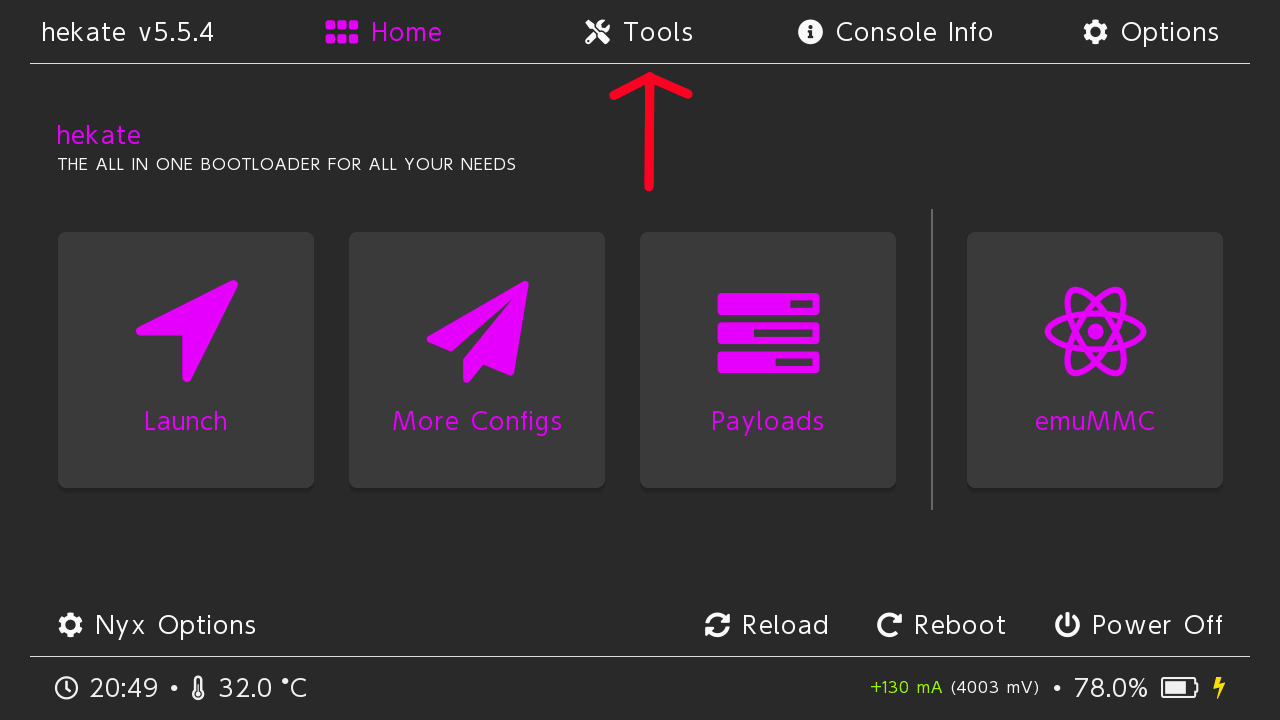
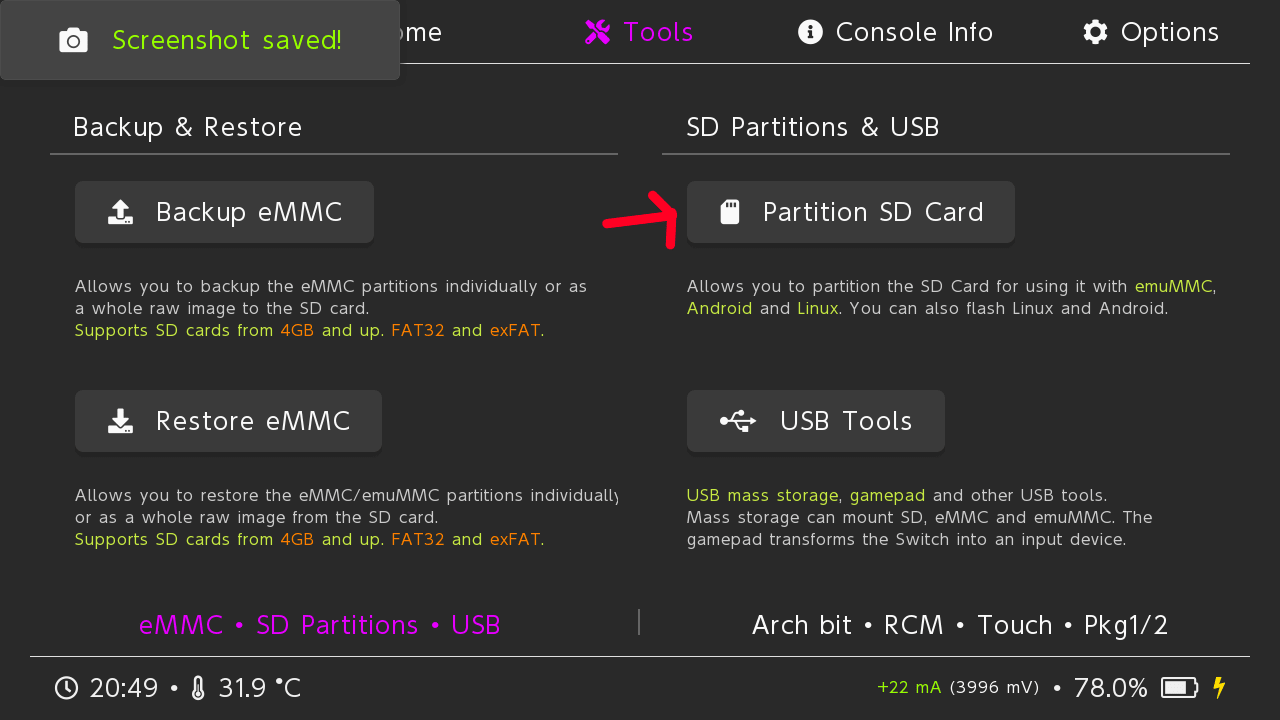
12. Navigate to `hekate`'s partition manager
13. Use sliders to select appropriate space for each OS (we recommend at least 16 GB for Android, although it should be usable with \~8GB), then press Next Step
14. Follow instructions and backup Nintendo folder or any CFW files if necessary via `hekate`'s SD UMS tool over USB-C or by removing the SD card and reading directly on a PC (`hekate`/Nyx can pause and reload when SD is removed)
15. Select "Flash Android" and reject the prompt to reboot to recovery (TWRP)
16. If you plan to use OpenGApps for Google Play functionality, download the ARM64 10.0 pico variant or ARM64 10.0 tvmini variant (for tab vs. atv) from [HERE](https://opengapps.org/) and place the zip in the root of the SD card
17. If you have any other flashable zips, place them on the root of the SD card
18. On the "Home" tab of `hekate`, select "More Configs," then "Switchroot Android", then hold VOL + until TWRP appears
19. Press Install, then "Select Storage" in TWRP and select "Micro SD Card"
20. Install the Lineage zip, followed by OpenGApps and any other zips you may have to install (see Extra Zips)
21. Upon installing the final zip, wipe cache/dalvik and reboot to system
22. If setup gets stuck on voice detection go back to the Wi-Fi config page and select "Skip for now"--Pico GApps should not include Google Assistant setup, but if you use a different package this issue could arise
### Extra Zips
* OpenGApps--grab the latest Android 10 ARM64 Pico (tablet) or TV Mini (ATV) package from [HERE](https://opengapps.org/) to add Google Play services, apps, and support
* Other packages (Nano, etc.) do work but can break setup, as Google Assistant setup fails to complete
* Don't flash ATV packages on tab or vice versa
* Super Overclock--grab the latest version from [HERE](https://github.com/Lumince/SwitchRoot-Q-Overclock) to overclock your Switch CPU to 2091 MHz
* JoyCon Xbox Layout--grab the package from [HERE](https://download.switchroot.org/android-10/extras/joycon-xbox.zip) to use an Xbox controller-style control scheme
### Updating
Updates are pushed through OTA (over-the-air) updates, just like any Android OEM's. Use the Updater in Settings to get the latest updates without losing data.